


如何使用 PNP-TR AFM 针尖在带有 Nanoscope® 软件的 Bruker® 系统上进行ScanAsyst®模式的 AFM 测量 - NanoWorld®
这是关于如何在ScanAsyst® 模式下使用相应的 NanoWorld® AFM探针来设置和扫描的使用方法分步说明
本说明适用于以下 NanoWorld®ScanAsyst® 模式 AFM 探针:
- ScanA
- PNP-TR, 短悬臂
- PNP-TRS
-
步骤
-
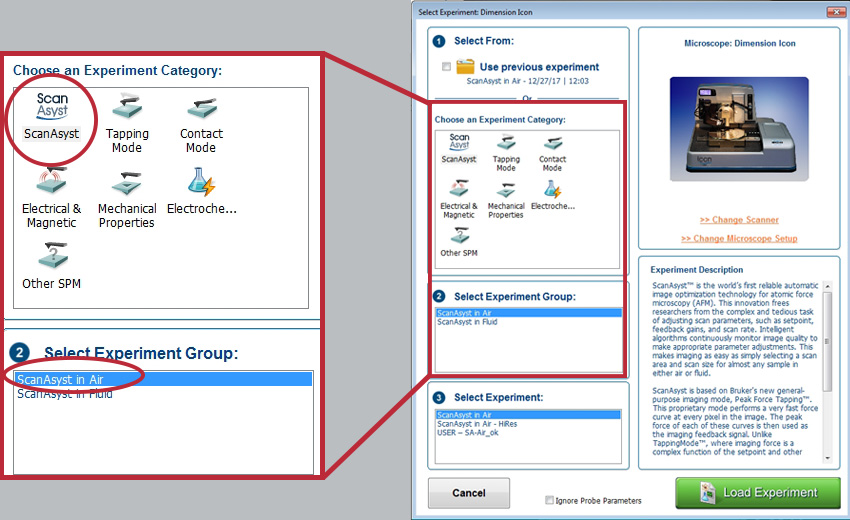
第一步:选择 AFM 实验
- 在 Choose an Experiment Category 当中选择 ScanAsyst®
- 在 Select Experiment Group 当中选择 ScanAsyst® in Air
- 在 Select Experiment 当中选择 ScanAsyst® in Air
-
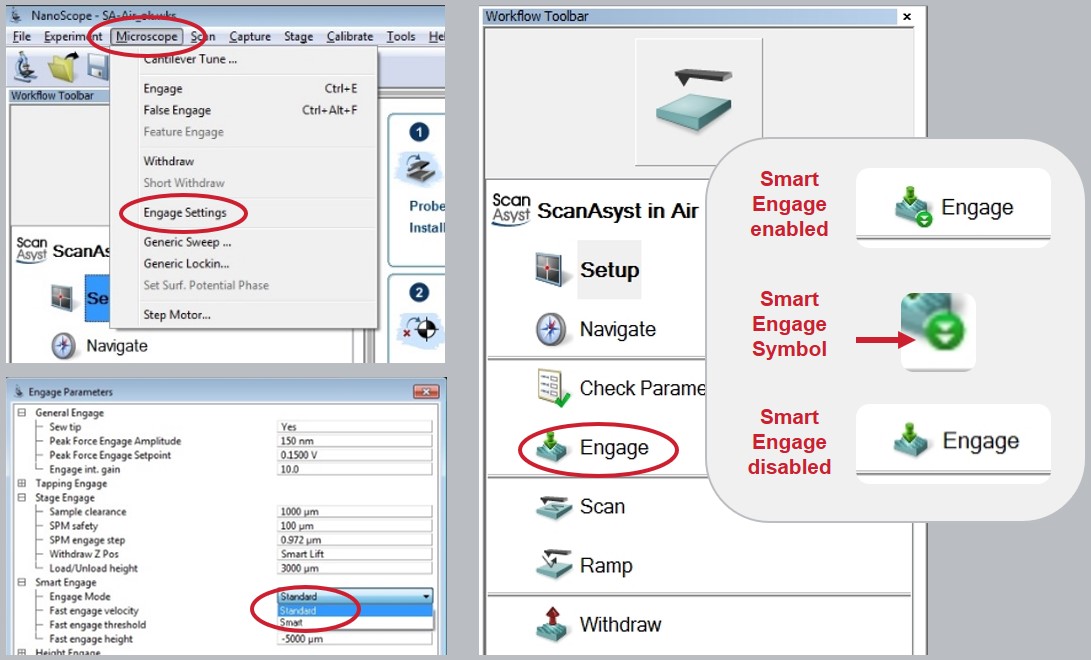
第二步:禁用 Smart Engage 选项, 用于在 ScanAsyst® 模式下进行测量
- 如果 Workflow Toolbar 当中的 Engage 图标显示 Smart Engage 符号, 则 Smart Engage 已启用
- 在 Microscope 当中, 选择 Engage Settings
- 在 Engage Mode 当中;下拉菜单中从 Smart 更改为 Standard 。确认。
- Smart Engage 现在已禁用
-
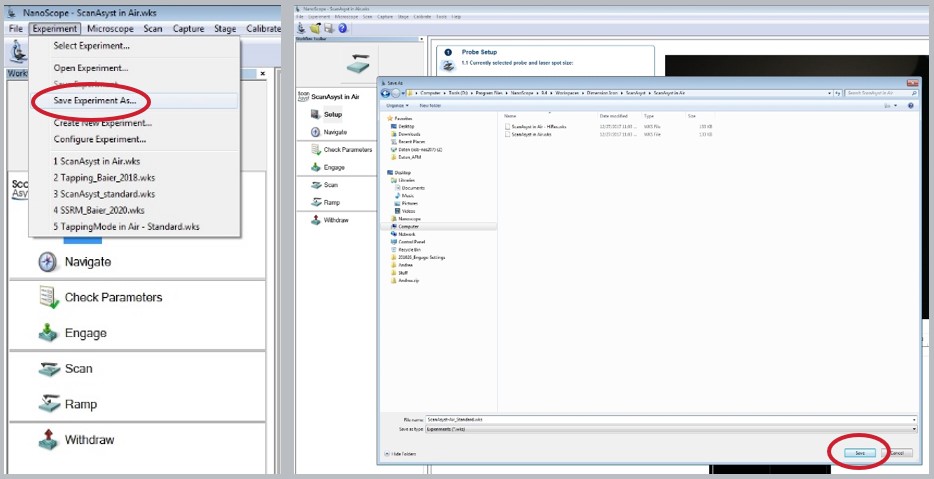
第三步:保存实验 Experiment
- 在 Experiment 当中选择 Save Experiment As
- 将 Experiment 另存为"空中 ScanAsyst – 标准使用"
- 将来使用此 Experiment
-
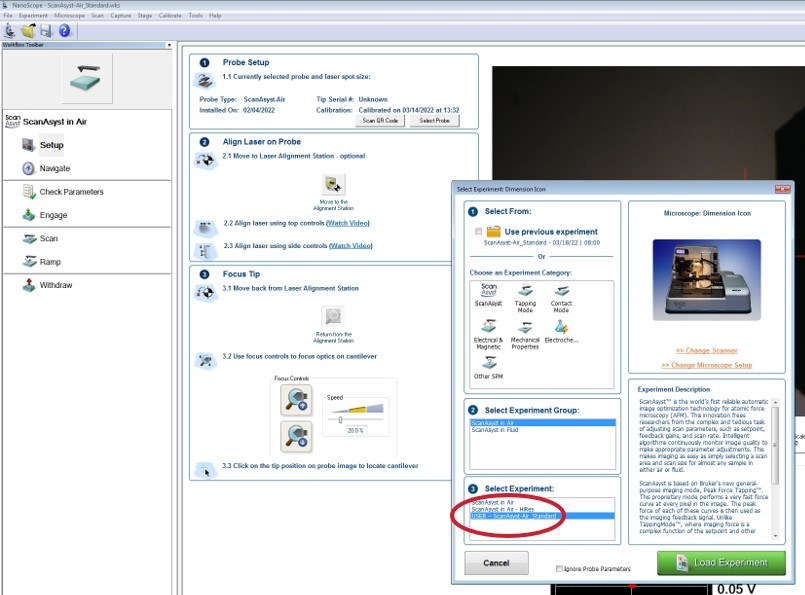
第四步:加载实验 Experiment,用于在 ScanAsyst® 模式下进行测量
- 如果步骤1、2、3已经完成一次,再次打开NanoScope软件时,跳过这三步,直接从第四步开始
- 在 Choose an Experiment Category 当中选择 ScanAsyst®
- 在 Select Experiment Group 当中选择 ScanAsyst® in Air
- 在 Select Experiment 当中选择 ScanAsyst in Air – Standard Engage
- Smart Engage 现已自动停用
-
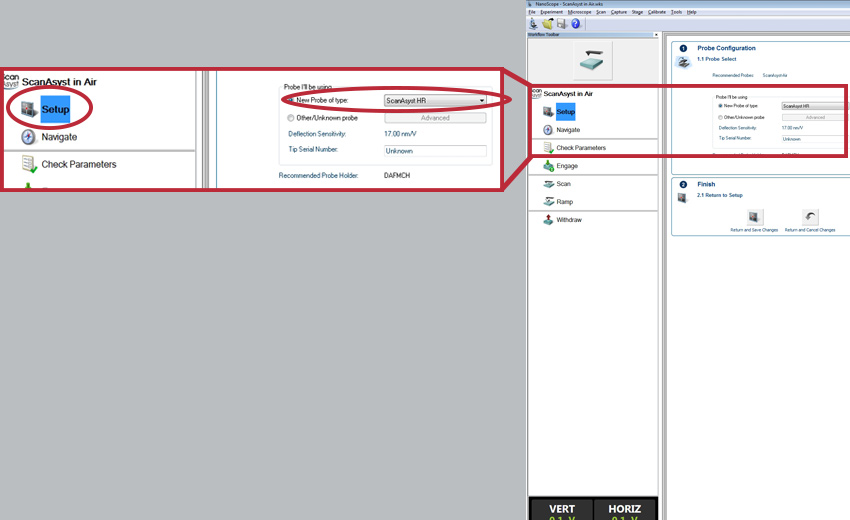
第五部:安装并选择 AFM 探针
- 将ScanAsyst®安装到AFM探针支架上
- 在 ScanAsyst® in Air 中选择 Setup
- 在 Probe I'll be using 中选择 New Probe of type
- 从下拉菜单中选择 ScanAsyst HR
-
第六步:调整激光
- 在 ScanAsyst®in Air 模式下选择 Setup
- 调整AFM悬臂上的激光
- 调整探测器上的激光
- 最大化 SUM 信号

-
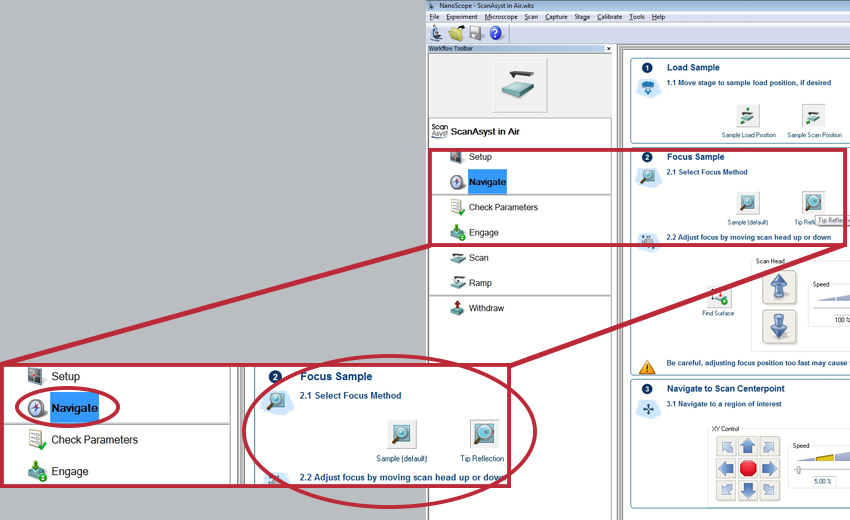
第七步:聚焦样品 / AFM 针尖反射
- 在 ScanAsyst®in Air 中选择 Navigate
- 在 Focus Sample 中选择 Sample (default) 或 Tip Reflection
- 通过移动扫描分别聚焦在样品上,分别在AFM针尖反射上头向上或向下
-
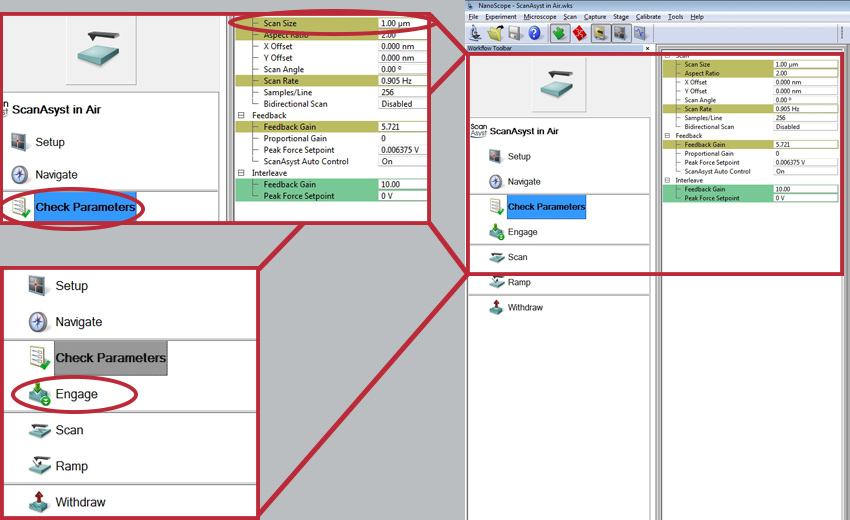
第八步:设置扫描尺寸并使用 AFM 探针
- 在 ScanAsyst® in Air 选择 Check Parameters
- 调整 Scan Size
- 选择 Engage
-
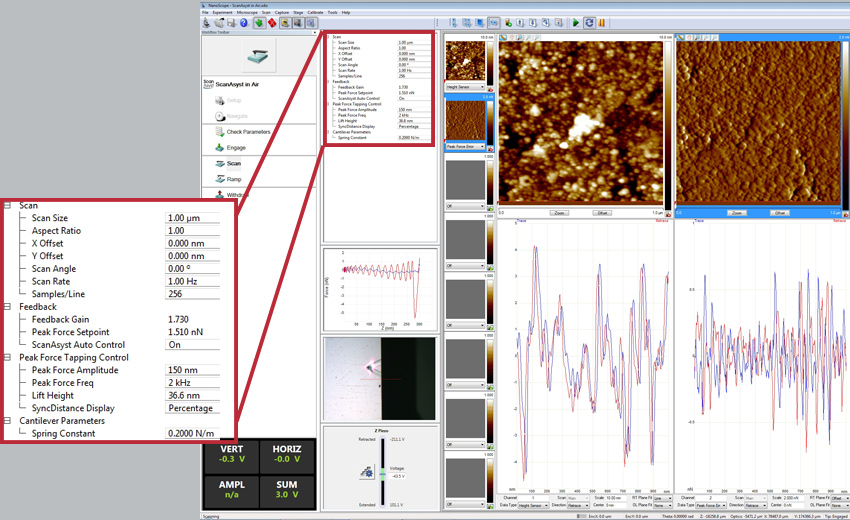
第九步:扫描样品,检查和调整扫描参数
- 扫描样本
- 如果需要,检查并调整 Scan Size
- 如果需要,检查并调整 Scan Rate (即扫描速度)
布鲁克®和 Nanoscope® 是布鲁克公司的商标
有关我们的 AFM 探针产品系列的详细信息,请参阅以下内容::
 POINTPROBE®
 ARROW™
 超短悬臂
超短悬臂
 耐热玻璃 - 氮化物
 涂层
涂层